Setting Up Qeryz Using WordPress Plugin
We’re excited to get you up and running on our survey. In order to get started there are just a few steps that need to happen.
Note: Before you start, please make sure that you have Qeryz WordPress plugin installed. Click Here to Download the Qeryz WordPress plugin
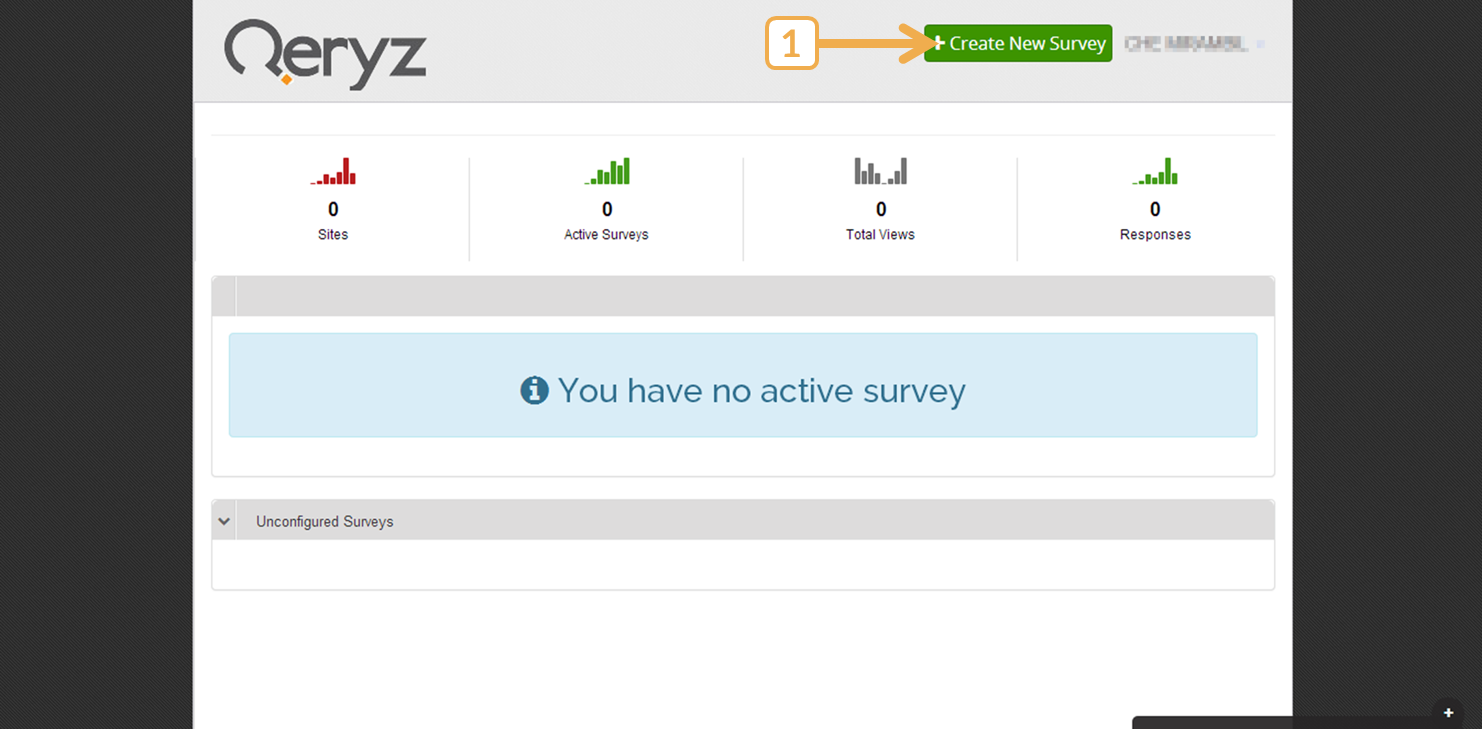
Step 1: Creating your first survey
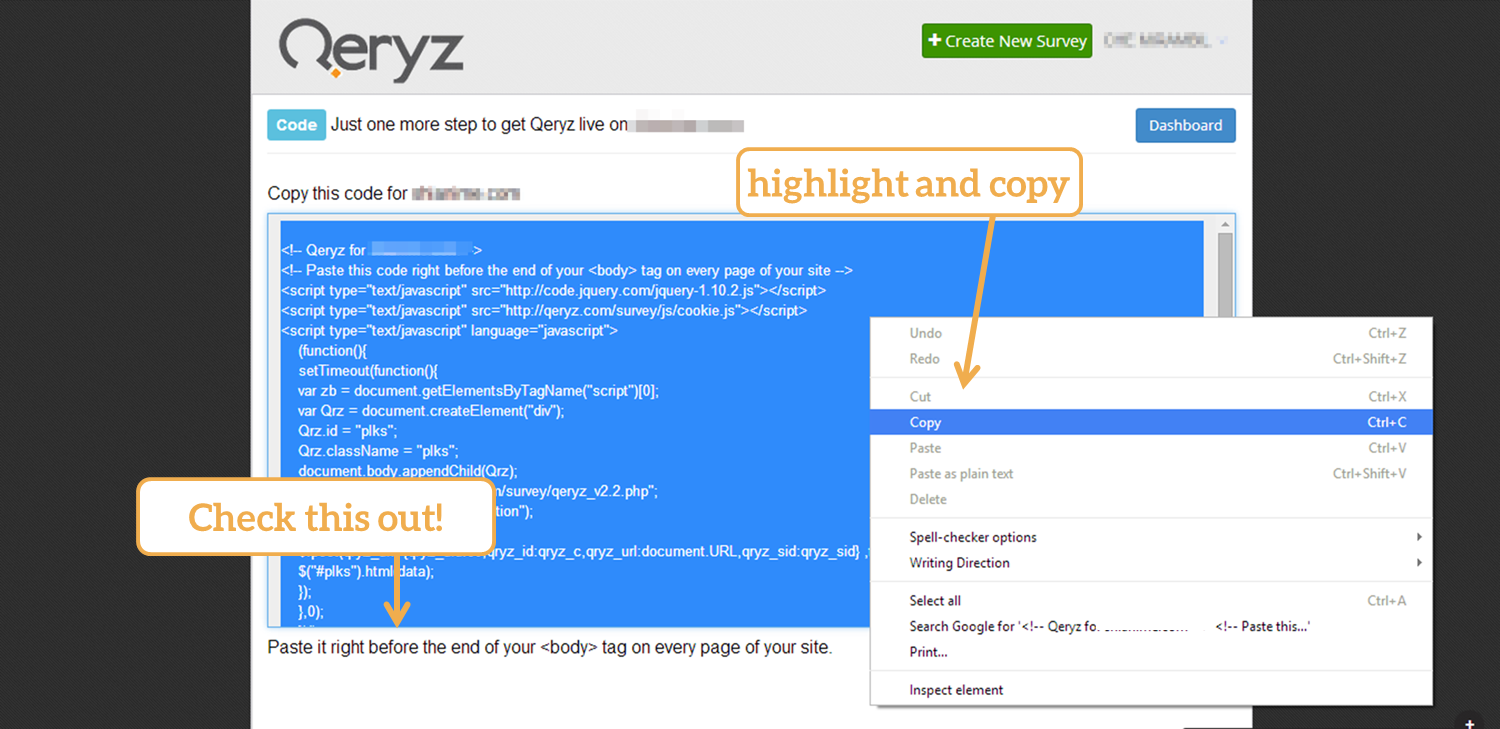
Here’s how you can do that, on your Dashboard, click “Create New Survey” button.
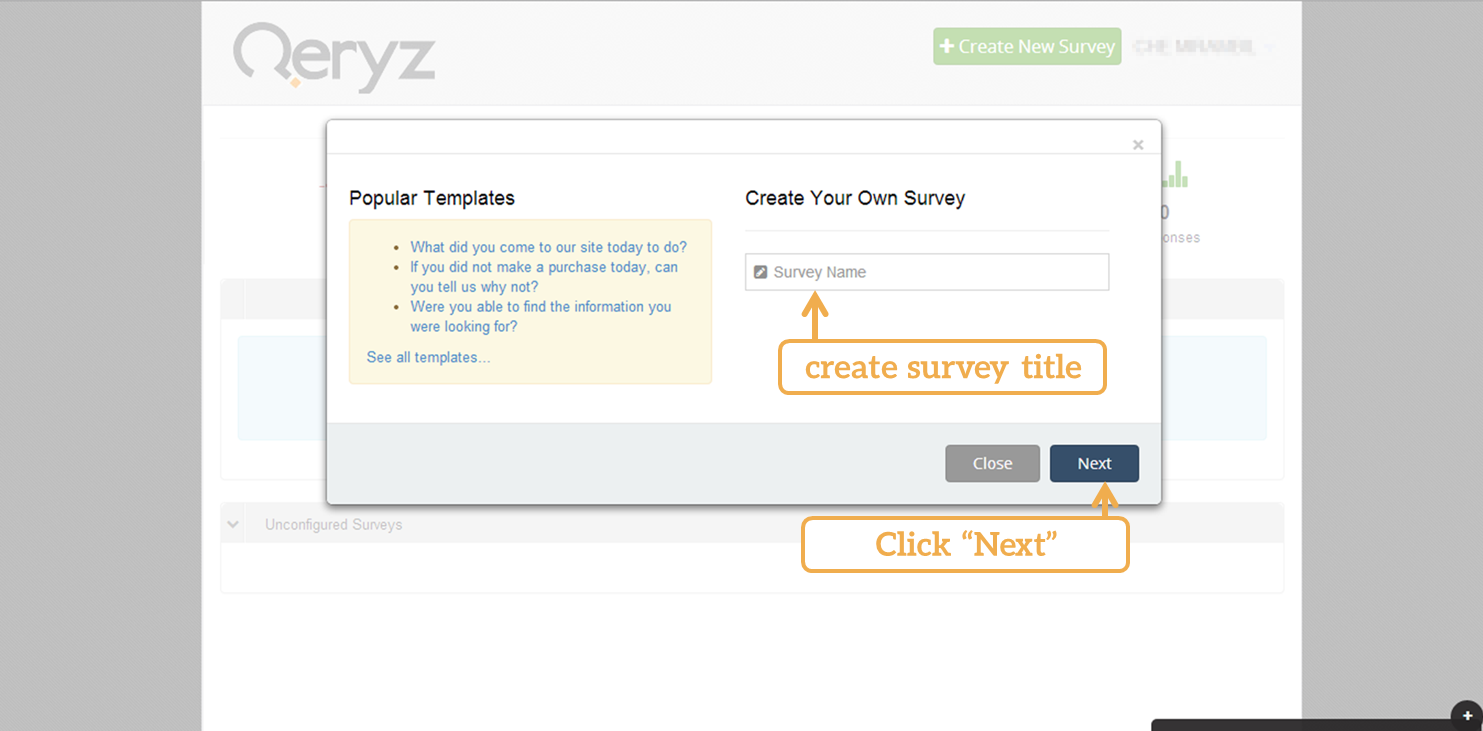
Step 2: Creating your survey title
After clicking on the “Creating New Survey” button, you’ll see a page that looks like the image shown below. If you wish to make a survey from scratch, create a survey title and click next.
Using Template:
Also, you can simply choose template from pre-defined templates. These templates are pre-made and can be customize to save time from making survey from scratch.
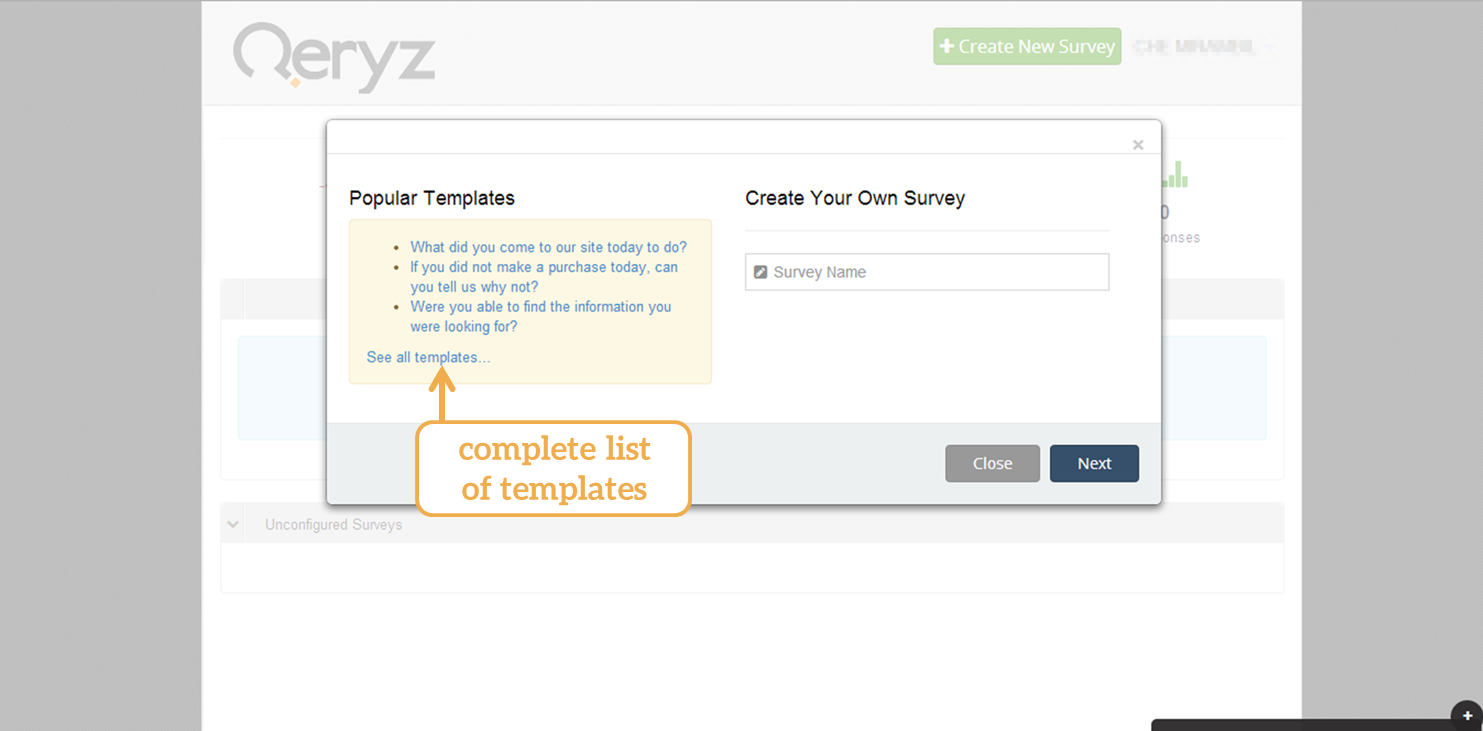
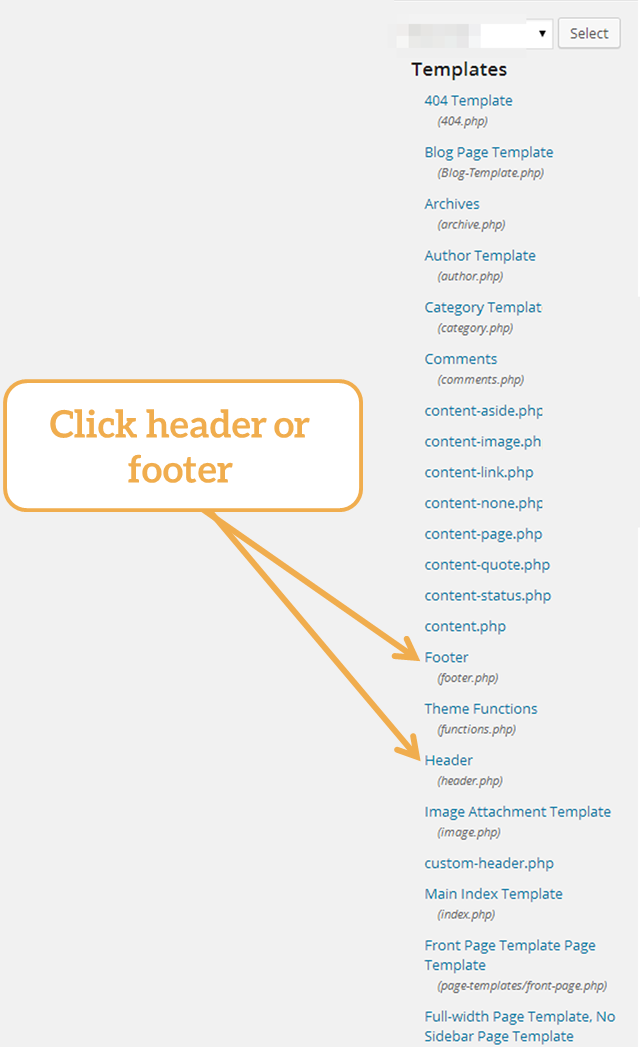
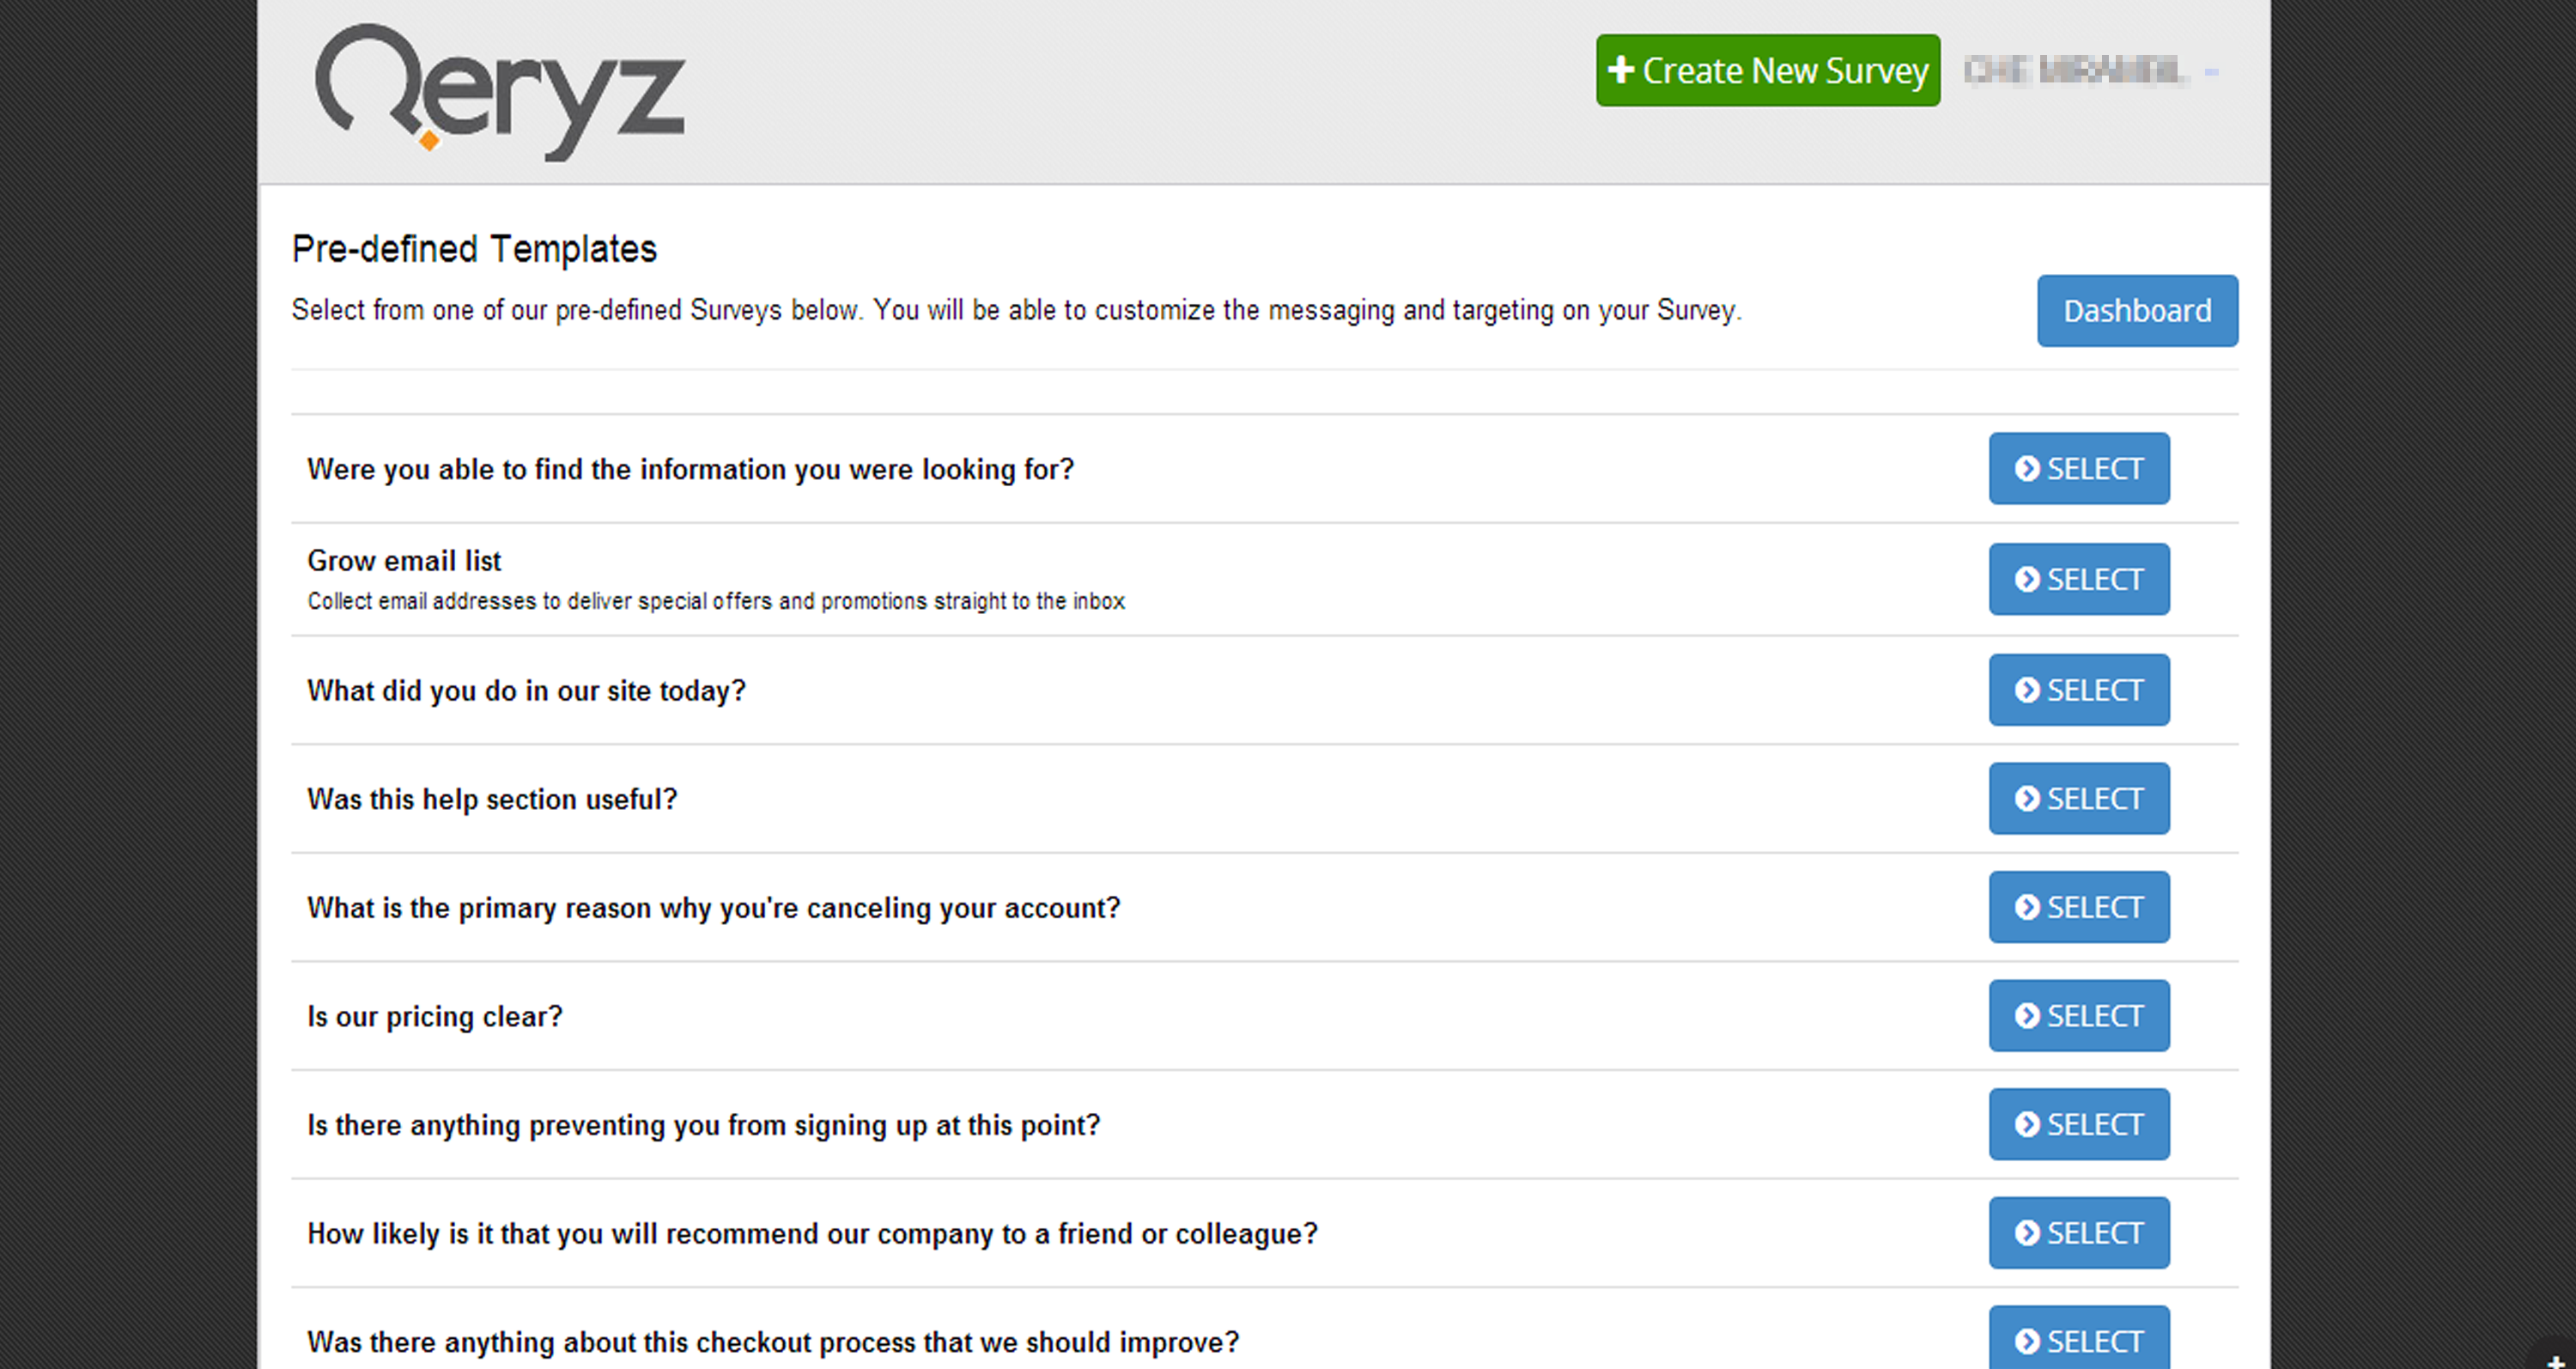
Complete list of Qeryz pre-defined Templates:
Here is what you’ll see if you select a “See all templates”…
Click “Select” and start making your own survey.
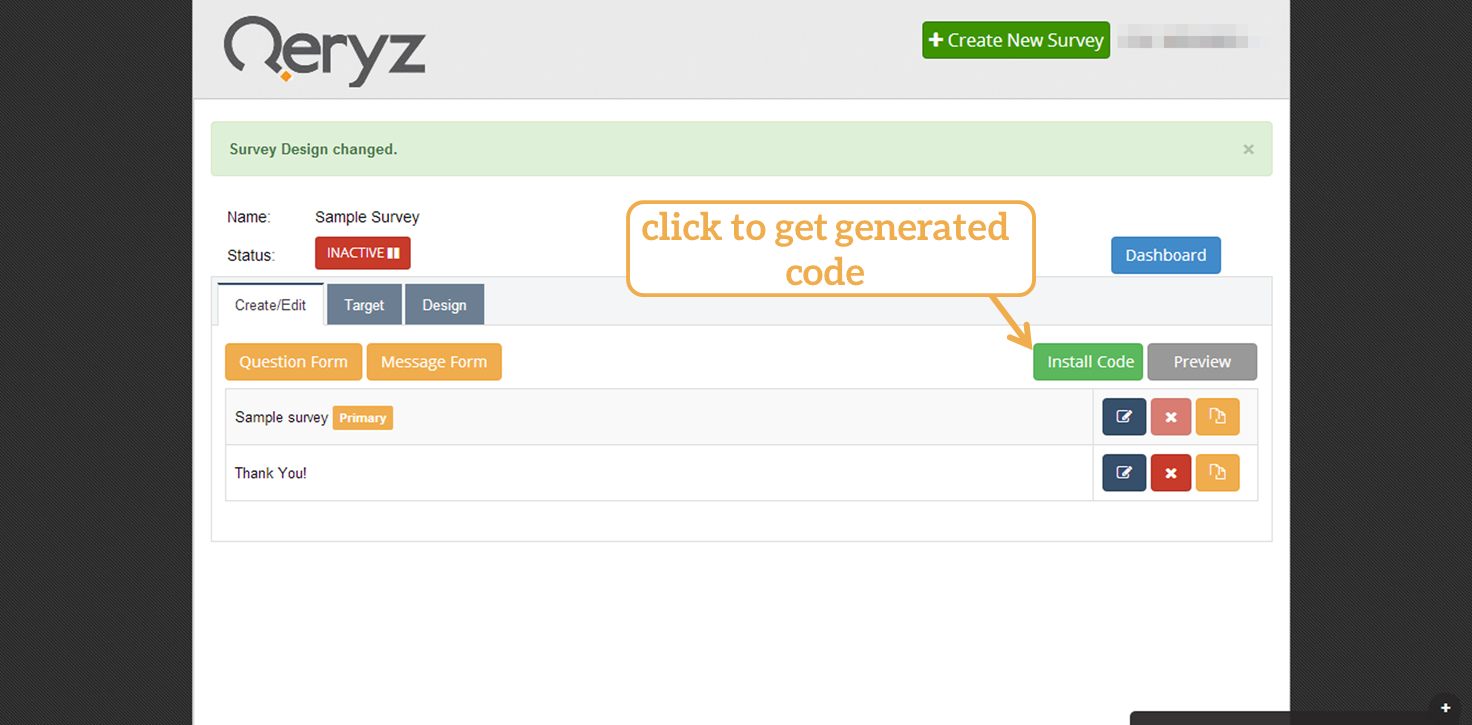
Step 3: Edit your Question Form:
Click one of the edit buttons to fill in the fields of your survey.
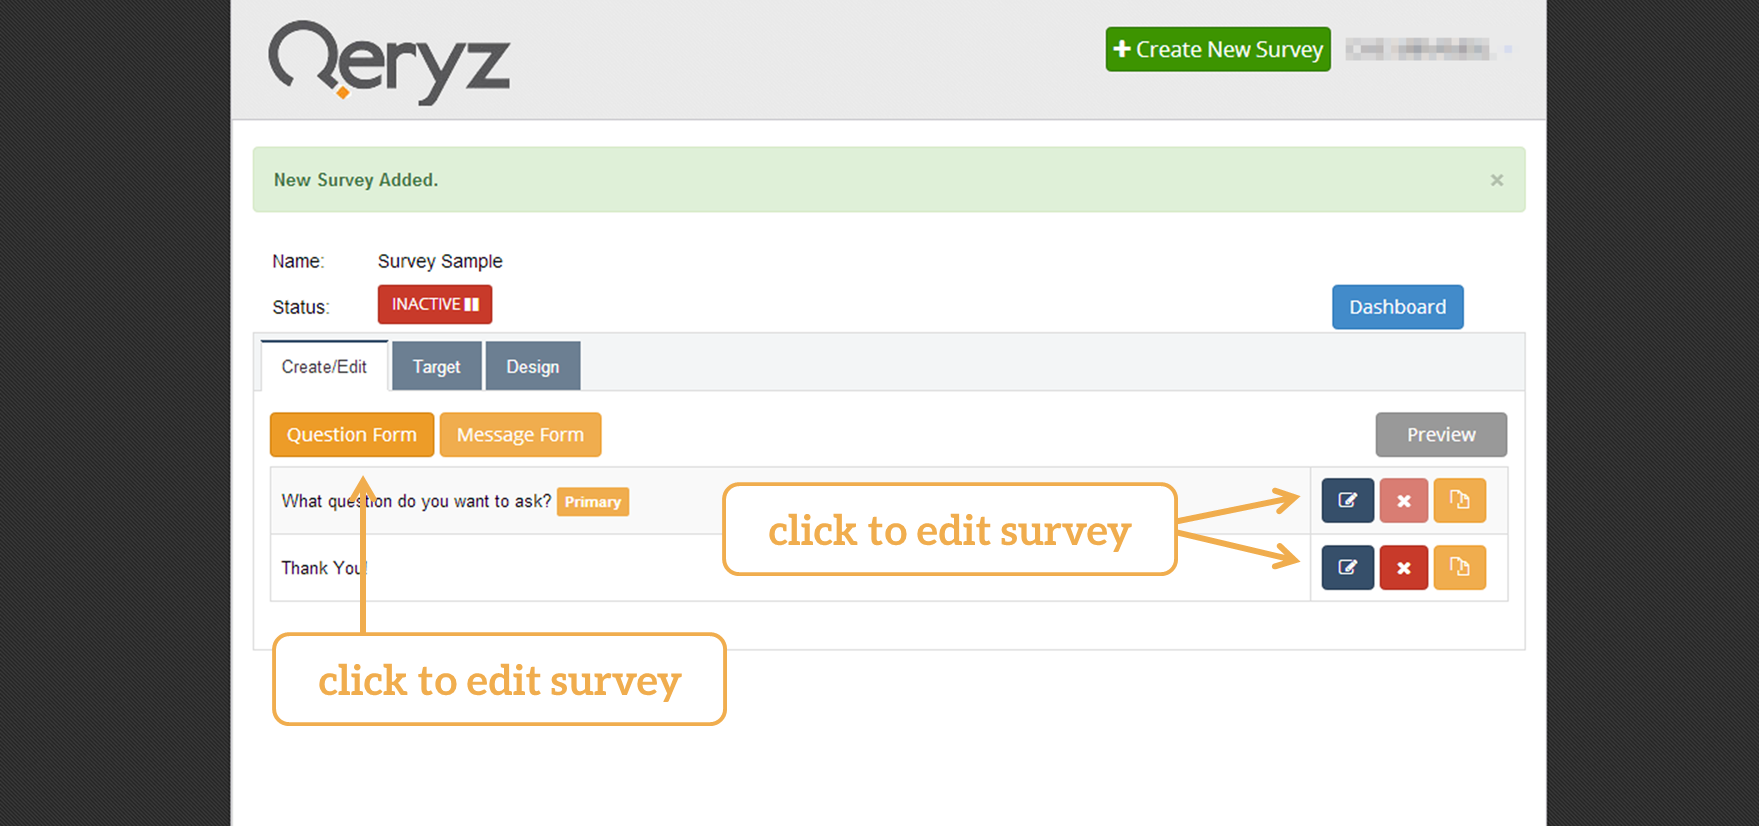
By clicking one of the edit buttons, question form will open next. Choose the answer type of your survey, whether it’s text-based, multiple answer, single answer selection, etc. You can also add answer buttons as much as you want. And don’t forget to click “Save” button.

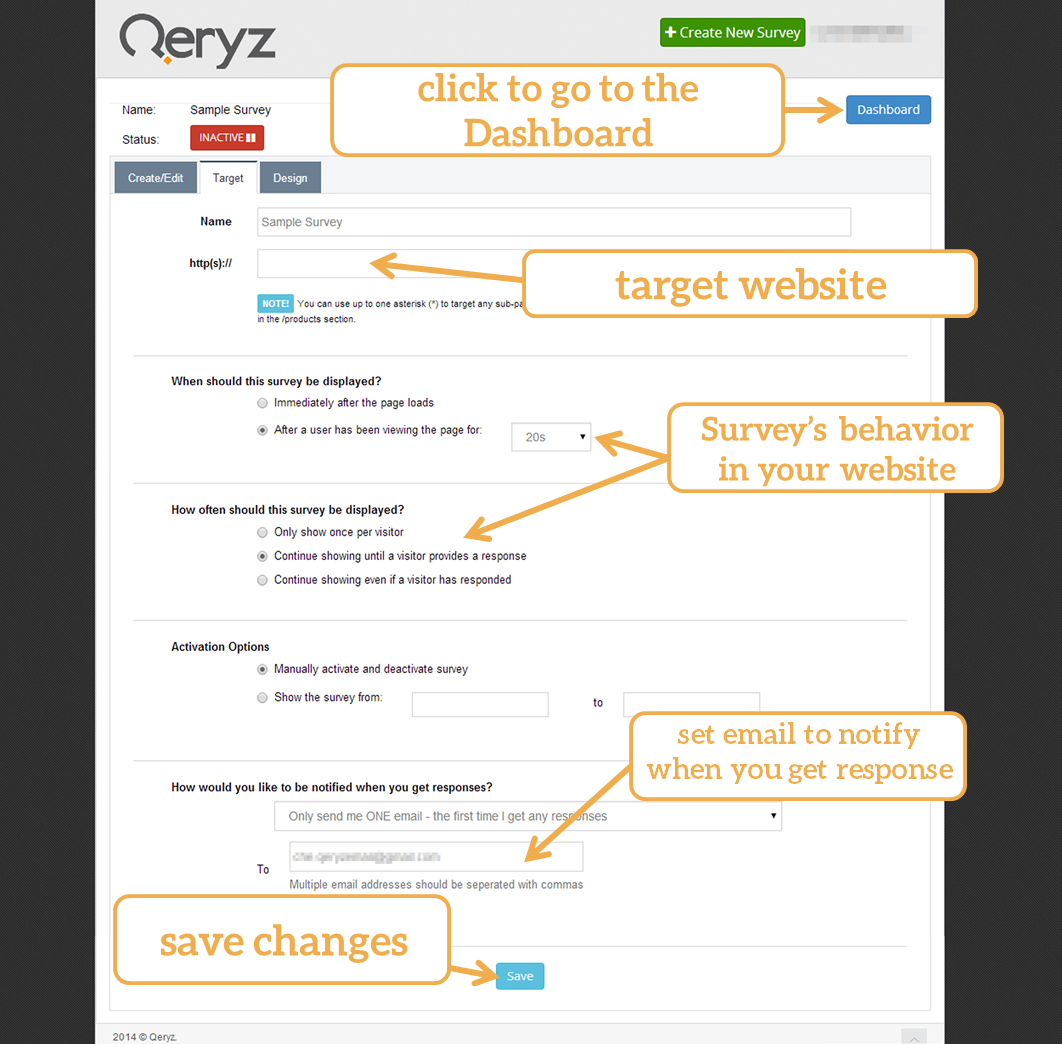
After fixing your question form, edit “Target” panel in your Dashboard. On target panel, you can set what page on the website you’d like to use the survey. Choose when and how often your survey would be displayed in your website and the email where you want to be notified when a response is made.
Here’s what your Target panel looks like:
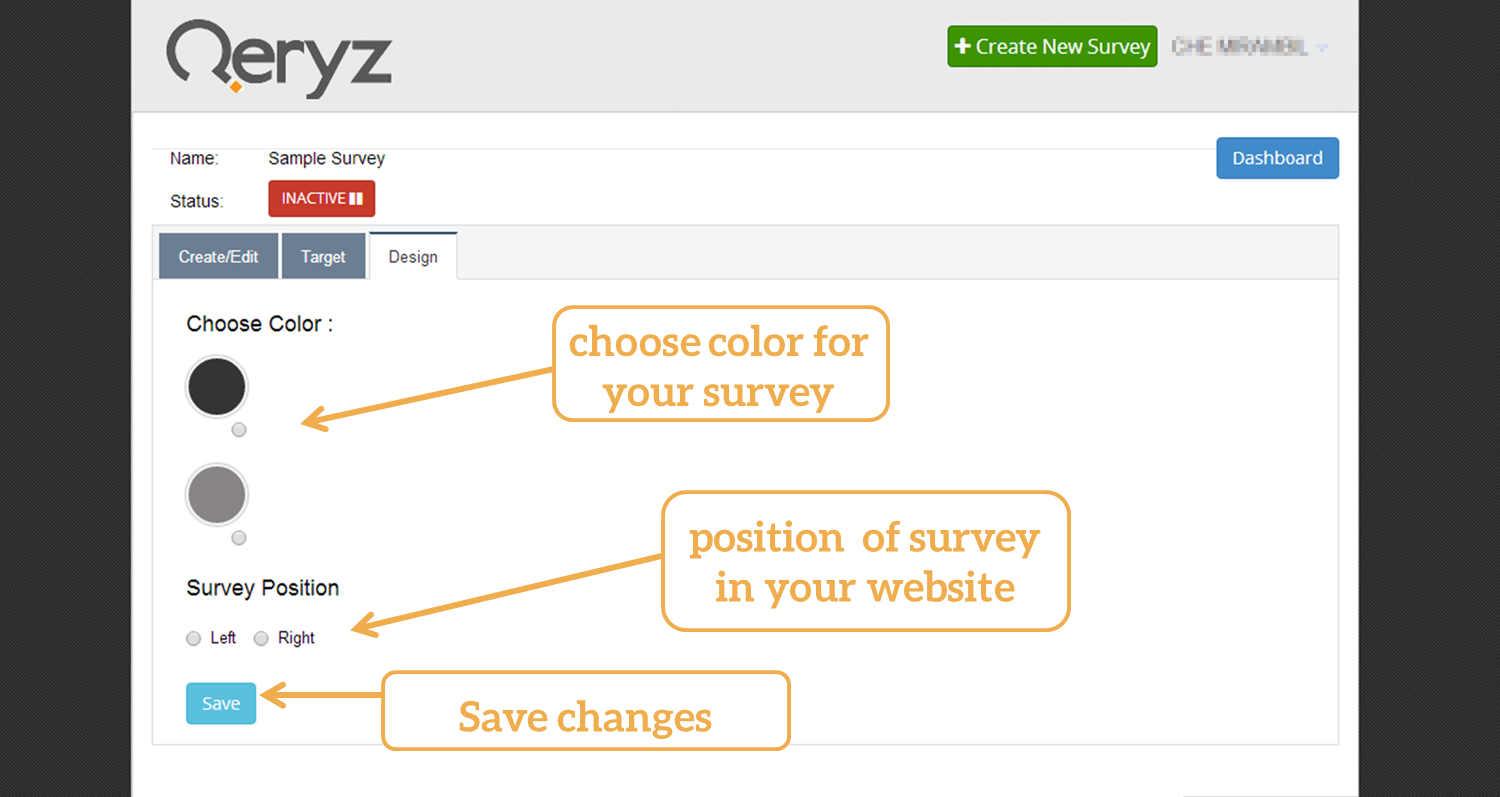
To customize the color of your survey, click the “Design Panel” in your Dashboard. You can select colors from black and gray. Choose where to put the survey in your website from left or right.
Here’s what your Design panel looks like:
You can view how your survey looks like by clicking the preview button.

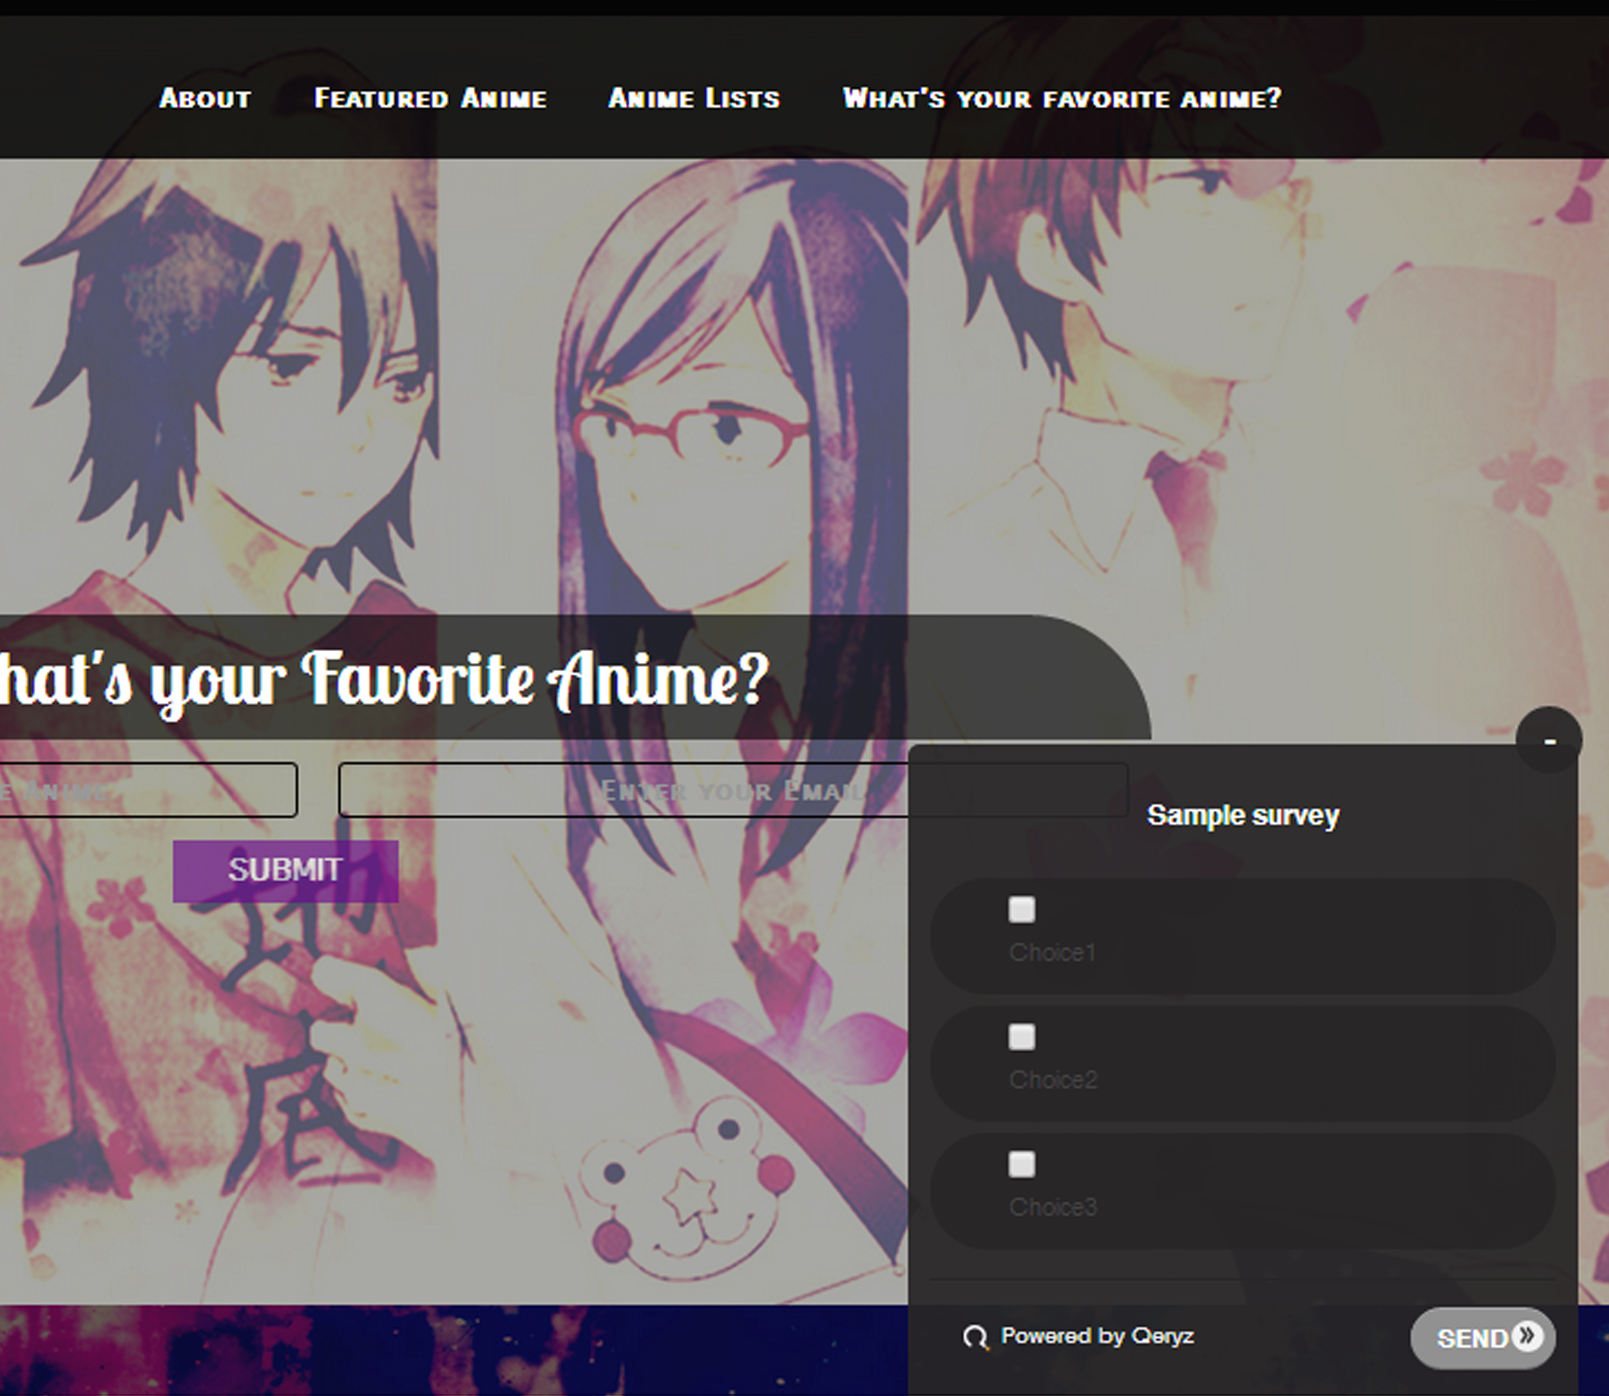
Step 4: Preview of the Survey:
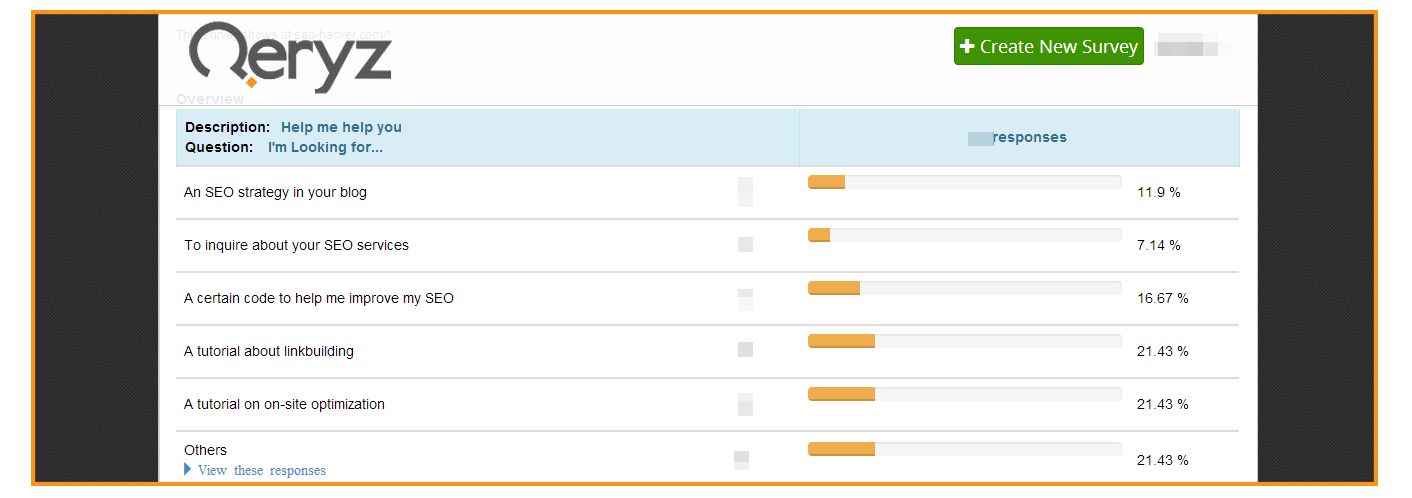
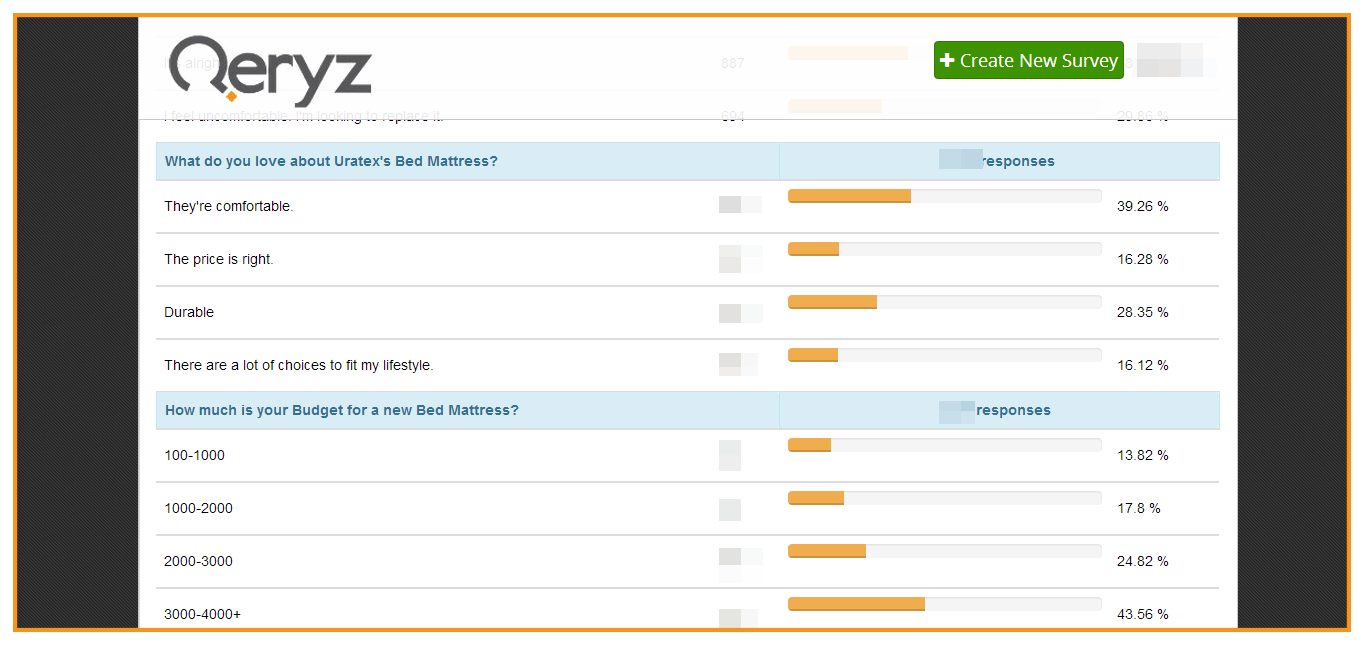
Here’s what your survey looks like. If you don’t like your survey you can always go back to edit tab of your dashboard.

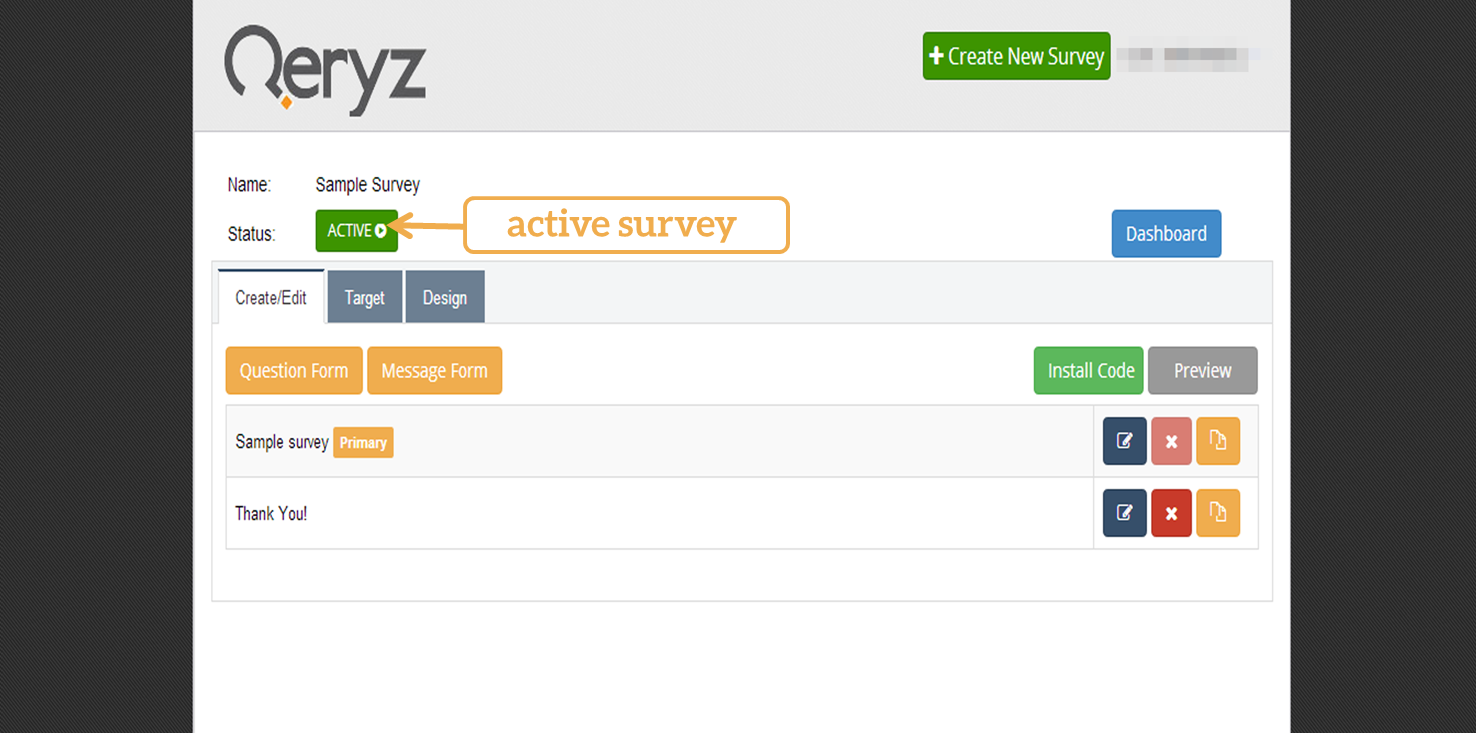
Step 5: Activate survey first:
Immediately enable your survey to get it up and running. You can find it in your dashboard on the left part of your survey’s name.

Activate your survey by clicking the red “inactive” button on your dashboard.
That red “unactive” button should turn into a green “active” button.
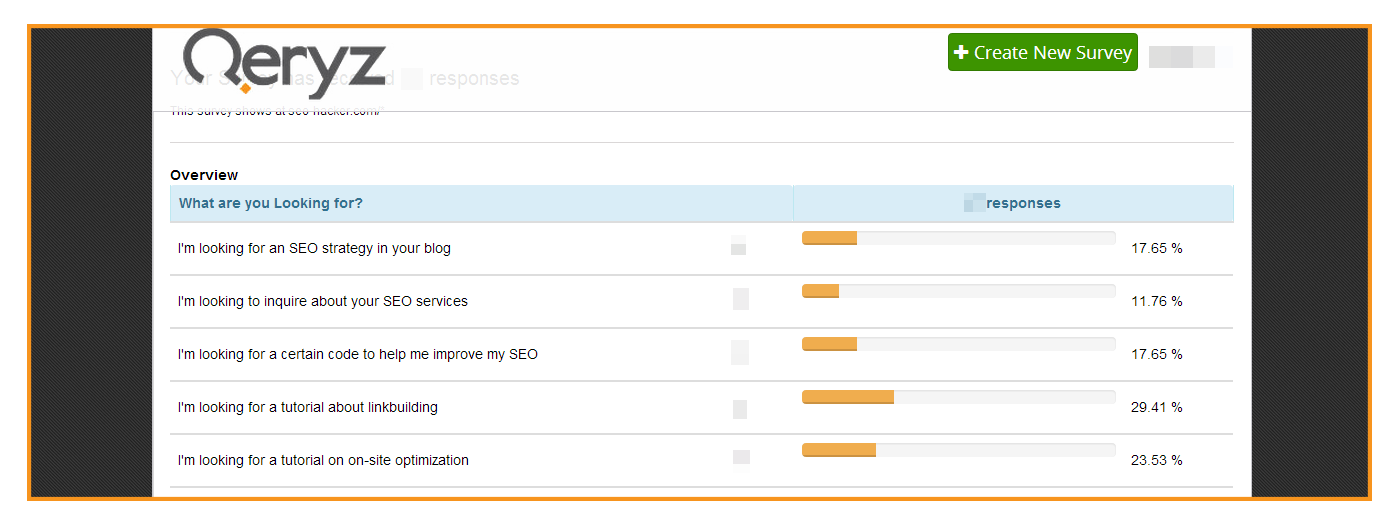
Qeryz at work:
Now, visit your website and see your customized Qeryz survey at work.
Note: Qeryz survey will appear immediately in your website depending on when you set it to appear using the targeting options.